

Canning Hatch chiles should be done with the pressure canning method as chiles are a low-acid food. If you wish to water bath can chiles, they must be acidified by pickling them before processing in a boiling water bath canner.
What is the Best Way to Preserve Hatch Chiles?
The best way to preserve hatch chiles depends on how the chiles will be used.
If using chiles as toppings for hamburgers, hotdogs, or nachos, then pickling hatch chiles is the way to go. Pickled hatch chiles can be safely water bath canned and preserved for up to a year at room temperature.
If using chiles in salsas, soups, or Mexican recipes, then home canning with a pressure canner is the best option. Hatch chiles, as a low-acid food, need to be canned using the pressure canning method, per the USDA.
Preparing Hatch Chiles for Canning
Pick hatch chiles that are mature, fresh, and free from blemishes for canning. The better the quality of the fresh chiles, the better quality the canned goods will be.
- Wash and dry the fresh chiles. Wear gloves for safety, and cut a slit in the side of each chile to allow steam to escape while roasting them.
- Blister each chile for 6-8 minutes using the broiler setting in an oven or on a stovetop or grill. Turn chiles frequently to keep from scorching.
- Once evenly blistered, remove the roasted hatch chiles from the heat and allow them to cool.
- Once cooled, remove the outer skin, stems, and seeds from the chiles.
- Chiles can be cut into pieces or left whole for the canning process.
- Process the roasted chiles within two hours or place them in a refrigerator for canning within 24 hours.

Pressure Canning Hatch Chiles Guide
Once the hatch chilis are prepared, follow this process to pressure can them:
- Inspect the jars for any cracks or imperfections and discard any with blemishes.
- Ensure the canning jars have been cleaned by running them through a dishwasher or handwashing them with soap and hot water.
- Sanitize the jars by placing them into boiling water for 10 minutes, then remove them with canning tongs and place them on a clean towel on a kitchen countertop.
- Wash and rinse the interior of the pressure canner before putting the rack plate in the bottom.
- Fill the canner to a depth of 3-4 inches with hot tap water or per the manufacturer’s instructions. Place it on the stove over low heat with the lid off and let the water heat up.
- Once the Hatch chiles have been roasted and prepped, add them to the sanitized jars, ensuring they aren’t packed too tightly. If you want to use salt for flavor, add 1 tsp per quart or ½ tsp per pint.
- Fill the jars with boiling water, leaving 1-inch headspace.
- Using a sanitized spatula, remove air bubbles by running the spatula along the inside of each jar.
- Wipe the rims of the jars and apply canning lids. Add screw bands and tighten until fingertip tight.
- Using jar tongs, place sealed jars on the jar rack. Follow the manufacturer’s instructions on the proper water level before sealing the lid.
- With the weight off or the valve open, turn the heat on high and allow the canner to vent steam for approximately ten minutes. This is to let air escape the canner before canning.
- After ten minutes, put the weight on or close the valve and allow pressure to build to the recommended level per your elevation and process for 35 minutes.
Recommended pressure per elevation for Hatch chiles in a dial-gauge pressure canner.
| Jar Size | Processing Time | 0-2000ft | 2001–4000ft | 4001–6000ft | 6001–8000ft | 8001–10,000ft |
| Half-pint | 35 mins | 11lbs | 12lbs | 13lbs | 14lbs | 15lbs |
| Pint | 35 mins | 11lbs | 12lbs | 13lbs | 14lbs | 15lbs |
- After processing, turn the heat off and allow the pressure to return to zero before removing the canner’s lid.
- Remove the jars using canning tongs or a jar lifter and place them on a towel-covered countertop.
- Allow the jars to cool for 12-24 hours before removing the screw bands and inspecting the seals.
- For sealed jars, label and store in a cool, dry place. For unsealed jars, reprocess with a new lid or refrigerate and use within 3-5 days.
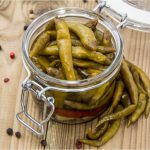
Water Bath Canning Pickled Hatch Chiles Recipe
- Total Time: 1 hour, 25 minutes
Description
Hatch chiles are a low-acid food, so they must have their acidity raised before they can be water-bath canned. The best way to do this is through pickling.
Ingredients
- 4–5 large Hatch chile peppers
- 1 large sweet onion
- 1 cup water
- 1 cup white vinegar (5%)
- ½ cup sugar
- 1 tablespoon Kosher or sea salt
- Pinch of red pepper flakes (optional)
Instructions
- Rinse, dry, and blister the Hatch chiles. Remove the skins, seeds, and stems once cool.
- Slice peppers in half lengthwise, then slice peppers halves into strips.
- Dice the onion into similar size strips as the peppers and mix them together.
- Combine water, white vinegar, sugar, pepper flakes, and salt together in a pot and bring the mixture to a boil.
- Place the pepper and onion mixture into hot, sterilized jars. Add brine to the jars, leaving ½ -inch headspace.
- Use a spatula to release any air bubbles. Wipe the rims of the jars and add lids and screw bands.
- Tighten lids to fingertip tight.
- Load the cans onto the jar rack in a single layer and lower them carefully into the water bath canner. Add water if needed to get the water level to 1 inch above the tops of the jars.
- Once the jars are in the canner, heat the water to a rolling boil and cover the canner with a lid.
- The processing time for half-pints or pints below 1,000ft of elevation is 10 minutes. Process an additional 5 minutes for elevations between 1,001 and 6,000ft or an additional 10 minutes for elevations above 6,000ft.
- Once processed, turn the heat off and remove the canner’s lid. Allow the jars to rest for 5 minutes.
- After 5 minutes, remove the jars from the canner with a jar lifter and place the jars on a towel-covered countertop.
- Do not retighten screw bands. Let the jars air cool for 12-24 hours. You should hear a popping sound as the jars seal as they cool.
- Once the jars are at room temperature, remove the screw bands and check the seals.
- If the seal is indented, the jar is safe to label and store in a cool, dark place.
- If the seal isn’t indented, you can use a new lid and reprocess the contents, or put the jar into the refrigerator and consume the peppers within a few days.
- Prep Time: 1 hour
- Cook Time: 25 minutes
Nutrition
- Serving Size: 1 cup
- Calories: 63kcal
- Sugar: 6g
- Sodium: 1500mg
- Carbohydrates: 15g
- Fiber: 2g
- Protein: 2g
The Best Canned Hatch Chile Recipes
Ready to use your canned Hatch chiles? Try some of these tasty recipes:
1. Hatch Pepper Pepperoni Pizza
Spice up a traditional pepperoni pizza with fiery Hatch chiles.
2. Pork Hatch Green Chili
Tasty pork shoulder, green chile sauce, and Hatch peppers make this hearty chili.
3. Hatch Chile Salsa Verde
This salsa is a perfect burrito topping and is full of Hatch chiles, tomatillos, and cilantro.
4. Green Chicken Enchiladas
This easy green chili enchilada recipe uses Hatch chiles to make a flavorful sauce to pair with crispy chicken and cheese!
5. Green Chile Potato Soup
This tasty soup combines Hatch chiles, potatoes, and quinoa into a hearty, filling dish.
What are the Benefits of Canning Hatch Chiles?
- Hatch chiles are a great source of vitamin C, calcium, and potassium
- Peppers like Hatch chiles can help the body’s metabolism and immune system
- Spice up any meal without needing to head to the grocery store
- Use Hatch chiles in soups, stews, or sauces

Do You Need to Peel Hatch Chiles Before Canning?
Hatch chiles, along with other tough-skinned chiles like poblanos or Anaheim peppers, should be peeled before canning.
It is best to remove the skin because of the tough, unwanted texture and the bitter taste it can give canned peppers.
How to Store Canned Hatch Chiles?
Canned Hatch chiles should be stored in a cool, dark, dry place at a temperature of 50°F to 70°F.
Pickled Hatch chiles should be stored in the refrigerator once they are cool. Make sure the jar stays sealed in between uses and the brine covers the peppers entirely.
How Long Will Canned Hatch Chiles Last?
Canned Hatch chiles have a shelf life of 1-2 years. As with any home canned food, it’s best to eat them within a year for the best quality and flavor.
If properly stored in the refrigerator, pickled Hatch chiles will last for two to three months.