

Amish recipes for canning cabbage start by increasing the acidity of the cabbage. The recipes involve pickling or fermenting and turning the cabbage into coleslaw, chow chow, or sauerkraut. Raising the acidity of low-acid foods like cabbage is necessary before using a water bath canner.
What Method Do the Amish Use for Canning?
While some Amish families do use the pressure canning method, most use water bath canning. Using food preservation techniques passed down for generations within their communities, they’ve been known to use traditional water bath canners.
Canning foods with low acidity in a water bath is not USDA-approved or recommended. Low-acid vegetables such as cabbage must have the acidity raised before canning if not using a pressure canner.
Print
Authentic Amish Canning Cabbage Recipe
- Total Time: 4 hours, 45 minutes
Description
This traditional Amish chow chow is a great way to use cabbage and other garden veggies to make a sweet and sour side dish that’s full of flavor.
Ingredients
- 2 quarts chopped cabbage (red cabbage or green cabbage)
- 1 quart chopped green tomatoes
- 6 large onions, chopped
- 3 sweet red peppers, chopped
- 4 tablespoons dry mustard
- 3 tablespoons white mustard seed
- 1½ tablespoons celery seed
- ½ tablespoon ginger
- 8 cups white vinegar
- 1 tablespoon cloves
- 4 cups sugar
- 2 tbsp salt
Instructions
- Chop the cabbage, tomatoes, onions, and peppers and place each in large bowls. Sprinkle each vegetable with a small amount of salt and marinate for 4 hours.
- Meanwhile, sterilize the canning lids and screw bands by washing them with hot soapy water and rinsing them.
- To sanitize the canning jars, fill a large pot on the stove with water, and bring it to a boil. Place the canning jars in the water for 10 minutes. Remove and place on a clean kitchen towel.
- Mix the brine ingredients together in a pot and bring to a rolling boil.
- Add the marinated vegetables to the brine and cook slowly for 20 minutes.
- Pack each canning jar with vegetables and cover them with brine, leaving ½ inch-headspace.
- Using a spatula or air bubble remover, release any trapped air in the jars.
- Wipe the rims of the canning jars with a damp cloth. Place lids and screw bands on jars, and screw to fingertip tight.
- Load cans onto jar rack and lower carefully into the canner. Add hot water if needed to get the water level to 1 inch above the top of the jars.
- Once the jars are in the canner, heat the water to a rolling boil and cover the canner with a lid.
- Process for 15 minutes if your elevation is less than 1,000ft above sea level. Process for 20 minutes if you live between 1,001 and 6,000ft, and process jars for 25 minutes if you live above 6,000ft.
- Once processed, turn off the heat and remove the lid from the canner.
- Allow the jars to rest for 5 minutes. After 5 minutes, remove the jars from the boiling water with a jar lifter or canning tongs and place them on a towel-covered countertop.
- Do not retighten screw bands. Let the jars cool for 12-24 hours at room temperature. You should hear a popping sound as the jars seal during the cooling process.
- Once the jars are completely cool, remove the screw bands and inspect the seals.
- If the seal is indented, the jar is safe to label and store in a cool, dark place.
- If the seal isn’t indented, you can use a new lid and reprocess, or put the jar into the refrigerator and consume it within a few days.
- Prep Time: 4 hours
- Canning Time: 25 minutes
- Cook Time: 20 minutes
Nutrition
- Serving Size: 1/2 cup
- Calories: 148kcal
- Sugar: 29.5g
- Sodium: 645.5mg
- Fat: 1.1g
- Saturated Fat: 0.2g
- Carbohydrates: 32.5g
- Fiber: 1.9g
- Protein: 1.9g
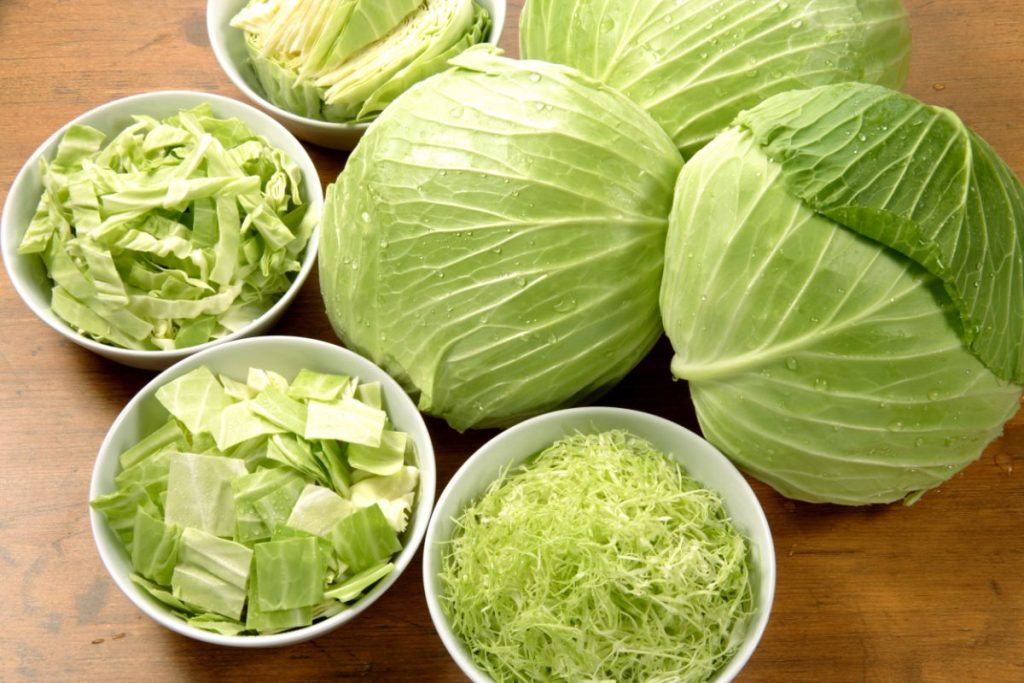
How Do You Cut Cabbage for Canning?
An easy way to cut cabbage and shred it for canning is to first cut the head into quarters, then rinse each quarter with running water. Once washed, remove the core from each quarter and then shred the cabbage.
Shredding can be accomplished by using a mandoline slicer, grater, or large knife, depending on how thin you want the shredded cabbage to be.
Is Canning Fresh Cabbage Recommended?
Cabbage tends to discolor and intensify in flavor when canned, so canning fresh cabbage is not recommended.
The NCHFP and USDA currently do not have any tested recipes for home-canning plain cabbage, so it’s advised not to do so without first pickling it as part of a relish, chow chow, or processing it into sauerkraut.
Do You Need a Pressure Canner to Can Cabbage?
Pressure canning is the only approved method for canning vegetables with low acidity, and a pressure canner can be helpful for canning cabbage. However, if you pickle or acidify cabbage first, it can be processed in a water bath canner.
Always use vinegar with 5% acidity when canning cabbage, and choose white vinegar or apple cider vinegar for the best flavor.
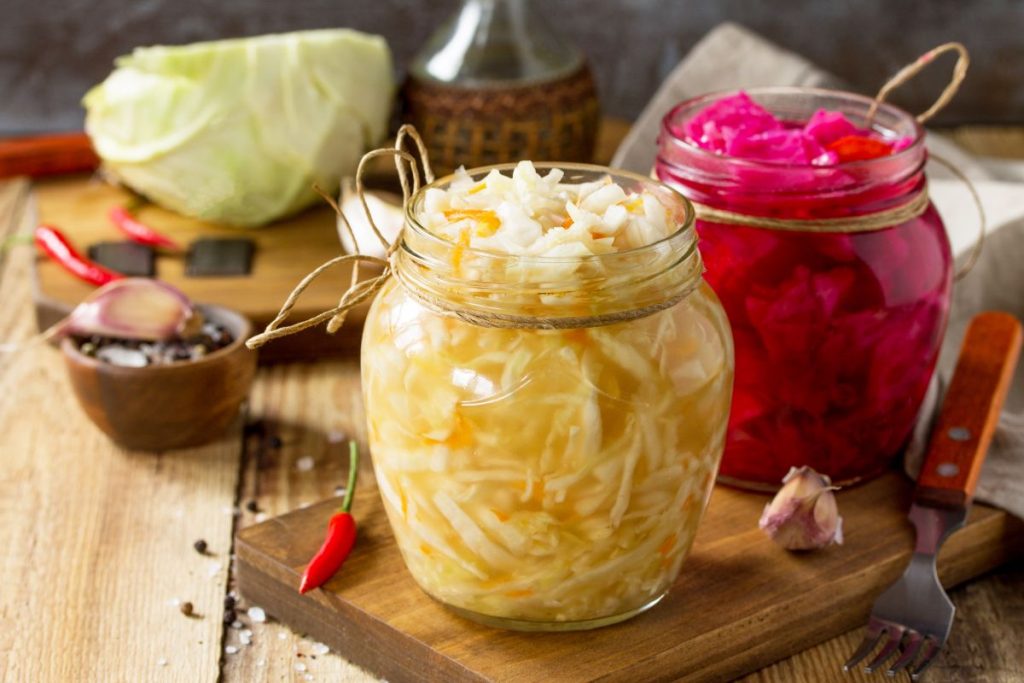
What is the Difference Between Cabbage and Sauerkraut?
Sauerkraut is the result of pickling or fermenting cabbage. Fresh cabbage is shredded and then packed in brine to undergo fermentation and develop into sauerkraut over time.
Traditionally, the fermentation process took weeks, and the live bacteria created acid in the jars, which preserved the food as a result. This is referred to as “live sauerkraut,” and the Amish still practice this method.
Can You Can Amish Coleslaw?
Amish coleslaw is perfect for canning. Amish coleslaw uses vinegar as a base instead of mayonnaise.
As long as canned coleslaw recipes acidify the cabbage properly, it is possible to preserve cabbage slaw using water bath canning.