
When canning potato soup, fill the hot canning jars with the cooked potato soup, leaving 1-inch headspace, and process in a pressure canner for 35 - 40 minutes. Once the canning process is complete, store the cooled jars in a dry, dark place for up to a year.
Is it Safe to Water Bath Can Potato Soup?
The National Center for Home Food Preservation (NCHFP) states water bath canning is unsafe for potato soup due to the insufficient temperatures reached during the process. Water bath canning uses temperatures of around 212°F.
To safely preserve low-acid foods like potato soup, pressure canning is necessary to reduce the risk of Clostridium botulinum, a bacteria that causes botulism. Pressure canners reach a higher temperature range of 240°F to 250°F which increases the internal temperature of the canned soup and kills harmful bacteria.
Print
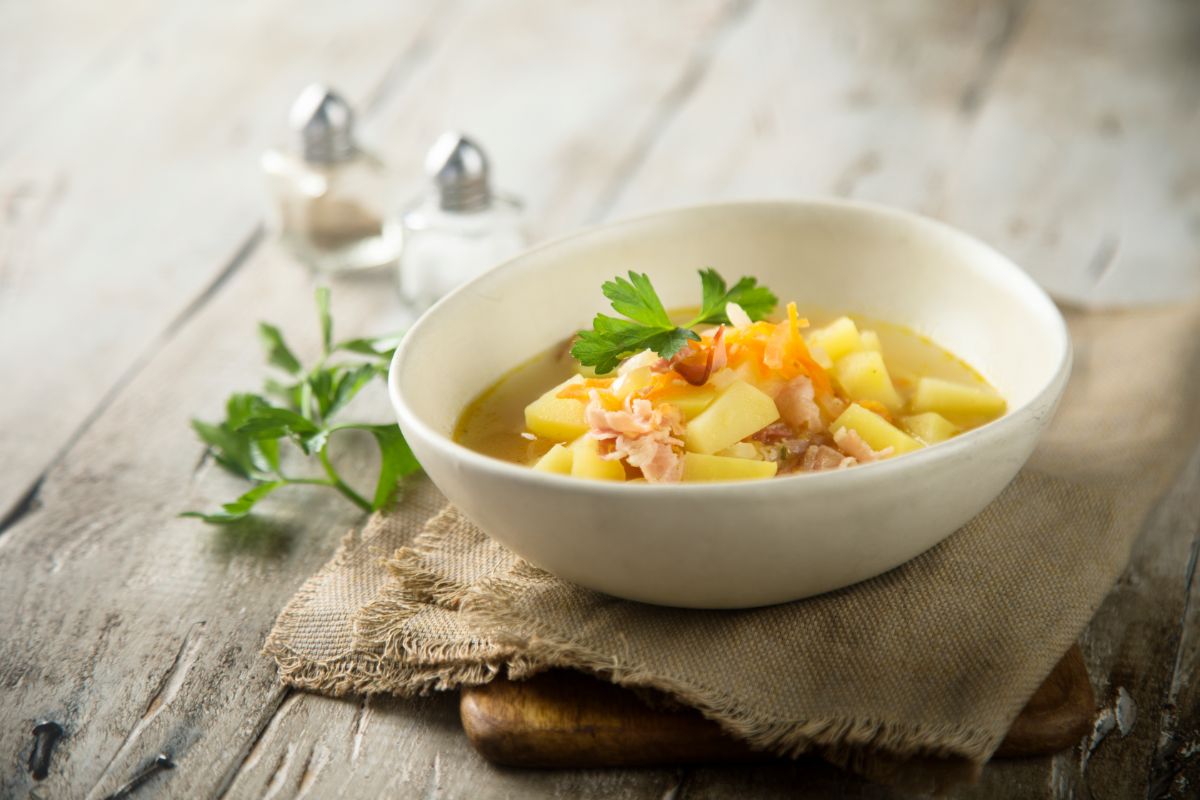
Homemade Potato Soup Canning Recipe
- Total Time: 2 hours, 15 minutes
- Yield: 8 pints 1x
Description
This home-canning potato soup recipe stands out for its exceptional flavor profile, combining creamy potatoes, aromatic herbs, and savory spices. A perfect balance of ingredients guarantees a rich and satisfying soup that will have everyone returning for seconds.
Ingredients
- 16 cups peeled and diced potatoes
- 1 cup red bell pepper, diced
- 1 yellow onion, diced
- 1 cup leeks
- 9 cups chicken broth
- 6 cloves garlic, minced
- ½ cup chopped celery
- 1 tsp paprika
- ⅛ tsp dried sage
- ¼ tsp cayenne pepper
- 1 tbsp chopped chives
- Olive oil
- 1 cup water
- 1 tsp salt
- ½ tsp pepper
Instructions
- Add a few inches of water to your pressure canner and place it on a stovetop over low heat.
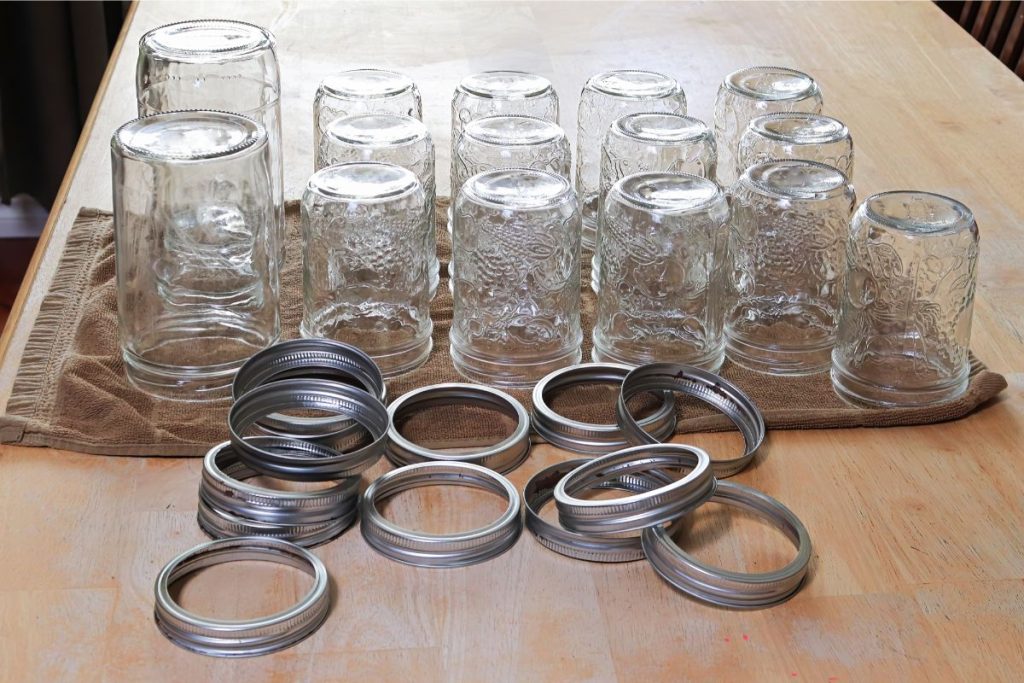
- Sterilize the canning jars by washing them in boiling water and dish soap or using the sterilize cycle of your dishwater. Wash the canning lids and bands with warm soapy water.
- Place the jars in the canner to warm them up.
- Put the onion, garlic, leeks, celery, and red bell pepper into a stockpot and fry them in olive oil for 8 minutes or until translucent.
- Add the water, potatoes, bone broth, chives, and spices to the pot.
- Bring the soup to a boil and leave for 15 minutes until the potatoes break down. The starch in the potatoes acts as a thickening agent and thickens the soup naturally.
- Carefully remove the hot jars from the pressure canner. Fill each jar with hot soup, using a canning funnel while leaving 1-inch headspace.
- Use a wooden spoon to remove any air bubbles that may have gathered inside each jar.
- Remove any residue from the rims of the jars by wiping them with a damp kitchen towel or paper towel. Top the jars of soup with new canning lids and bands, twisting them until they are fingertip tight.
- Put the jars back into the canner using canning tongs, put the lid on the canner, and turn up the heat. Open the valve and let the canner vent steam for 10 minutes.
- After venting the canner, close the vent and allow the pressure to build to the correct PSI per altitude and process pint jars for 35 minutes and quart jars for 40 minutes.
Dial-Gauge Pressure Canner
- 0 – 2,000ft: 11 lbs
- 2,001 – 4,000ft: 12 lbs
- 4,001 – 6,000ft: 13 lbs
- 6,001ft and up: 14 lbs
Weighted Gauge Pressure Canner
- 0 – 1,000ft: 10 lbs
- 1,001ft and up: 15 lbs
Post Processing
- When the processing time has elapsed, turn off the heat on the stove and allow the pressure to release naturally.
- Once the dial gauge reads zero, remove the pressure regulator and release the remaining pressure.
- Open the lid and use tongs or a jar lifter to transfer the jars carefully to a clean towel-covered countertop or work surface. Leave the jars undisturbed to cool at room temperature for 12 to 24 hours.
- Test the seals on the jars by using your thumbs to press on the center of the lids. If they flex, they have not sealed properly and must be reprocessed immediately with new canning lids or moved to the refrigerator and used within 3-5 days.
- All properly sealed jars of potato soup should be cleaned, labeled, and stored in a cool, dry, dark place.
- Prep Time: 45 minutes
- Canning Time: 1 hour, 30 minutes
Nutrition
- Serving Size: 454g
- Calories: 320kcal
- Sugar: 6.4g
- Sodium: 2,592mg
- Fat: 8g
- Saturated Fat: 4.8g
- Carbohydrates: 51.2g
- Fiber: 3.2g
- Protein: 6.4g
- Cholesterol: 0mg
Can You Can Baked Potato Soup?
Baked potato soup is a delicious and popular variation of potato soup, and it can be safely preserved through the canning process. You may add ingredients such as cooked bacon and chives to the soup before canning.
However, dairy ingredients, including cheese, milk, and cream, cannot be safely included in your baked potato soup recipe. For the best results, add fresh dairy ingredients just before eating the soup after heating it from the jar.

Can You Can Soup with Milk In It?
Authoritative sources, including the USDA and the National Center for Home Food Preservation, do not recommend canning milk or dairy products. They suggest adding it when reheating or serving the soup. This ensures that the dairy is heated to a safe temperature of 165°F and consumed immediately.
What Kind of Jars Do You Need to Can Soup?
Home canning jars, such as Ball or Mason jars, should be used for canning soup. These jars are made of tempered glass and have a two-piece lid consisting of a metal band and a flat metal lid with a sealing compound. Common sizes for canning soup include 16-ounce pint jars and 32-ounce quart jars.
Regular-mouth and wide-mouth jars can be used for canning soup, but wide-mouth jars are more convenient for filling and emptying the contents, especially for chunky soups. They allow easier access for ladles or spoons during serving and cleaning. Regular-mouth jars are suitable if you prefer a narrower opening or already have them on hand.
What are the Benefits of Canning Potato Soup?
- Convenience: Canning potato soup offers the convenience of having a ready-to-eat meal at your fingertips.
- Long shelf life: Canned potato soup has a long shelf life, allowing you to preserve the flavors of this delicious dish for an extended period.
- Nutritional value: Potato soup can be a nutritious option when prepared with wholesome ingredients.
- Portion control: Canning potato soup allows you to portion and preserve it in individual jars, which helps with portion control and reduces food waste.
- Preserving surplus potatoes: Canning potato soup allows you to make the most of a bountiful potato harvest or surplus potatoes.
How to Store Canned Potato Soup
To properly store canned potato soup, follow these guidelines:
- Choose a cool and dark storage location for storing canned potato soup, with a temperature below 70°F to maintain quality and prevent spoilage.
- Ensure that the storage area is away from direct sunlight, as exposure to light can degrade the quality of the soup over time.
- Before storing, check the jar seals and ensure the lids do not move or pop when pressed.
- Label and date the canning jars to track and use the oldest jars first while rotating your stock.
What is the Shelf Life of Canned Potato Soup?
The shelf life of canned potato soup depends on the specific recipe, ingredients used, canning process, and storage conditions. Most home-canned soup, including potato soup, lasts up to one year.
Always inspect the jars before consuming the canned potato soup. If you notice any spoilage, such as bulging lids, strange odor, or mold growth, discard the soup immediately, as it may indicate bacterial contamination or improper sealing.