Description
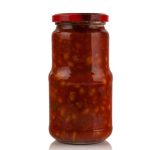
This homestead canning pork and beans recipe offers a combination of tender pork, flavorful beans, and a delicious sauce. Enjoy this “pork n’ beans” as a side dish or main course!
Ingredients
Scale
- 2 pounds navy, pinto, or great Northern beans
- ¼ cup brown sugar
- 2 medium onions, chopped
- 2 tablespoons honey
- ¾ teaspoon prepared yellow mustard
- 3 cups water
- 2 pints of homemade tomato sauce or ketchup
- 1½ to 3 tablespoons sea salt
- 1 lb of diced bacon, salt pork, or fatback
Instructions
- Use the soak method by leaving dry beans in a large pot or gallon jar, covering them with 3 inches of water, and letting them soak for 10 to 12 hours or overnight.
- Once soaked, rinse the beans under running water and drain them in a colander or strainer.
- Sterilize canning jars and lids by washing them with hot, soapy water. Keep the jars and lids hot until needed. You can keep them in simmering water or a warm oven.
- In a separate pot, combine water, tomato sauce, honey, mustard, brown sugar, and optional hot sauce to make the sauce. An alternative combination is tomato juice, dry mustard, and a piece of salt.
- Boil the beans for 30 minutes in a large pot. Optional: If you prefer Boston baked beans, pour the sauce over the beans; cover and bake at 350ºF for about 3½ hours. Boston baked beans will need to have water added and a soupy consistency for home-canning baked beans.
- Brown the bacon or salt pork in a skillet on medium-high heat for a few minutes, taking care not to cook it until it is crispy as it will continue cooking in the canner. Browning the meat first helps prevent clumping in the jar, as well as removing air and liquid so more can be added.
- Using a ladle and canning funnel, evenly distribute the beans, salt pork or bacon, onions, seasonings, and sauce among the hot jars.
- Fill the jars with boiling water, leaving 1-inch headspace.
- Remove air bubbles by running a soft kitchen utensil like a spatula around the inside of the jars. Wipe the jar rims, and attach the lids and rings. Screw the rings until fingertip-tight.
- Fill the canner with water and a splash of white vinegar.
- Add the jars, seal the canner, and ensure the heat is on high to build pressure.
- Vent the canner for at least 10 minutes, then place the regulator on and allow the pressure to build to the recommended level per your canner type and elevation:
Dial Gauge Pressure Canner
- 0-4,000ft: 11 lbs
- 4,001-6,000ft: 12lbs
- 6,001-8,000ft: 13lbs
- 8,001-10,000ft: 14lbs
Weighted Gauge Pressure Canner
- 0-1,000ft: 10 lbs
- 1,001ft and up: 15 lbs
Post Processing
- For all canner types, ensure you have processed pints for 75 minutes and quarts for 90 minutes.
- After processing, allow the pressure to return to zero, unseal the lid, and remove the jars using canning tongs. Set them on a cushioned surface to sit undisturbed for 12-24 hours.
- Check the seals on the jars by pressing on the lids. If the lids flex, they are not properly sealed. Label all sealed jars with the date and contents and store in a cool, dry place.
- Prep Time: 30 minutes
- Canning Time: 90 minutes
- Cook Time: 75 minutes
Nutrition
- Serving Size: 1 cup
- Calories: 268kcal
- Sodium: 1047mg
- Fat: 3.9g
- Saturated Fat: 1.5g
- Carbohydrates: 51g
- Fiber: 14g
- Protein: 13g
- Cholesterol: 18mg