Description
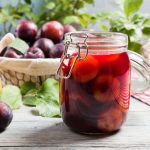
This recipe for water bath canning plums captures the natural sweetness and tang of plums while maintaining their texture. The balance of flavors and precise processing time ensure a delightful treat you can enjoy throughout the year.
Ingredients
Scale
- 9 lbs of freestone plums
- 10 cups water
- 1 cup of sugar
- Optional: cinnamon sticks, star anise, bourbon, fruit juice
Instructions
- Fill your water bath canner with at least two inches of water and set it on the stove over low heat.
- Sterilize either pint jars or quart jars by boiling them in soapy water or using the sterilize cycle on your dishwasher.
- Give your canning lids and bands a thorough cleaning with warm soapy water and rinse well.
- Warm up the canning jars by placing them in warm water inside the canner.
- Combine the water and sugar in a large pot. Bring the mixture to a rolling boil over medium-high heat.
- Wash the plums and remove the pits if desired.
- If you are canning whole plums, prick the skins with a toothpick to prevent the skin from popping. The plums will have room to expand and keep their shape inside the jars. Alternatively, cut plums in half for canning plum halves.
- Hot pack method: place the prepared plums into the stockpot of boiling syrup and boil for 2 minutes. Turn off the heat and let them sit for 20 to 30 minutes. Some people like to add cinnamon, star anise, or a dash of bourbon for flavor.
- Pack the hot plums into the hot jars using a ladle. Leave a 2-inch headspace after adding the solid plums. Fill the jars with hot syrup, water, or juice and leave a ½ inch headspace.
- Raw pack method: fill the jars with raw plums and add hot water, juice, or syrup, leaving a ½-inch headspace.
- Remove air bubbles by running a soft kitchen instrument around the inside of the jars.
- Wipe the rims of the jars clean with a damp kitchen towel or paper towel and securely place new canning lids on the tops of each jar. Apply the screw bands and tighten until fingertip tightness.
- Use canning tongs to transfer the jars into the canner, placing them on the canning rack. Bring the water to a rolling boil and process according to jar size and packing method:
Water Bath Canning Processing Times
- 0 – 1,000ft: hot packs 20 mins; raw packs 25 mins (pints and quarts)
- 1001 – 3,000ft: hot packs 25 mins; raw packs 30 mins (pints and quarts)
- 3,001 – 6,000ft: hot packs 30 mins; raw packs 35 mins (pints and quarts)
- 6,001ft and up: hot packs 35 mins; raw packs 40 mins (pints and quarts)
Post Processing
- Turn off the heat after the processing time and remove the canner’s lid. Leave the jars in the hot water inside the canner for 5 minutes.
- Carefully lift the jars onto a work surface protected by a clean towel using tongs or a jar lifter. Leave them to cool undisturbed for 12 to 24 hours.
- Test the seals by gently pressing the center of the lids with your thumbs to check for proper sealing. Remove the screw bands and wipe the jars clean. Label all sealed jars and store them in a cool, dark place. For unsealed jars, reprocess immediately with new lids or refrigerate and use the contents within 3-5 days.
- Prep Time: 1 hour
- Canning Time: 40 minutes
- Cook Time: 10 minutes
Nutrition
- Serving Size: 100g
- Calories: 63kcal
- Sugar: 15g
- Sodium: 20mg
- Fat: 0g
- Saturated Fat: 0g
- Carbohydrates: 16g
- Fiber: 1g
- Protein: 0g
- Cholesterol: 0mg