Description
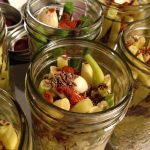
This recipe for old-fashioned “dilly beans” packs a lot of flavor into one jar! This recipe is great for first-time canners as it uses the raw pack method. Enjoy pickled green beans canned with fresh dill and garlic year-round with this recipe.
Ingredients
Scale
- 4 lbs fresh green beans (5 to 6 inches long)
- 8 to 16 sprigs of fresh dill
- 8 cloves garlic
- 1/2 cup pickling or canning salt
- 4 cups white vinegar (5% acidity)
- 4 cups water
- 1 tsp hot red pepper flakes (optional)
Instructions
- Wash and trim green beans. Cut them into 4-inch pieces, discarding the stems.
- Sterilize canning jars, lids, and screw bands by placing them in boiling water for 10 minutes.
- Remove the jars using a jar lifter and place them on a towel-covered countertop.
- In each sterile pint jar, place one to two heads of dill and a clove of garlic.
- Place beans upright in the jars, leaving ½ inch headspace. Trim beans to get the proper headspace, if necessary.
- Combine salt, vinegar, water, and pepper flakes in a pot. Bring the solution to a rolling boil.
- Using a canning funnel or ladle, carefully pour the hot brine over the green beans, leaving ½ inch headspace.
- Using a sterilized spatula or bubble remover tool, release any trapped air bubbles by running the utensil along the inside of each jar. Add additional brine if necessary to maintain ½-inch headspace.
- Wipe the rims of the filled jars. Place sanitized jar lids and screw bands on jars, and screw until fingertip tight.
- Load cans onto jar rack and lower them into the canner. Add hot water if needed to raise the water level to 1 inch above the top of the jars.
- Once the jars are in the canner, heat water to a rolling boil and place the lid on the canner.
- Process for 5 minutes if your elevation is between 0 and 1,000ft, 10 minutes for elevations between 1,001 and 6,000 ft, and 15 minutes for anything above 6,000ft.
- Once processed, turn the heat off and remove the lid of the canner. Allow the jars to rest for 5 minutes.
- After 5 minutes, remove the jars from the canner with a jar lifter or jar tongs and place them carefully on a cushioned surface.
- Do not retighten screw bands. Let jars air cool for 12-24 hours. You should hear a popping sound as the jars seal during the cooling process.
- Once the jars are completely cool, remove the screw bands and check the seals.
- If the seal is indented, the jar is safe to label and store in a cool, dark place.
- If the seal isn’t indented, you can use a new lid and reprocess them, or put unsealed jars into the refrigerator and consume them within a few days.
- Prep Time: 15 minutes
- Canning Time: 15 minutes
- Cook Time: 5 minutes
Nutrition
- Serving Size: 1/2 cup
- Calories: 32kcal
- Sugar: 1.2g
- Sodium: 1447mg
- Fat: 0.1g
- Carbohydrates: 6.2g
- Fiber: 2.7g
- Protein: 1.5g
