Description
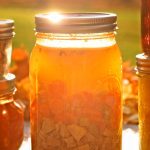
This traditional chicken soup recipe will become a family favorite. Stock your pantry with this canned soup instead of store-bought and savor the flavor all year long.
Ingredients
Scale
- 16 cups chicken stock
- 3 cups diced chicken
- 1½ cups diced celery
- 1½ cups carrots, sliced
- 1 cup diced onion
- 3 chicken bouillon cubes (optional)
- ½–1 teaspoon salt (optional)
- ½–1 teaspoon pepper (optional)
Instructions
- Inspect the canning jars, lids, and rings for cracks or other defects. Wash them in hot soapy water and rinse well. Simmer the clean canning jars at 180°F until ready to fill.
- Wash your vegetables thoroughly under cool running water.
- Peel carrots, re-wash them, and then slice them into uniform pieces. Cut onions into ½-inch slices and coarsely dice celery stalks.
- Prepare your chicken breast or whole chicken by removing excess fat, bones, and skin before cutting it into 1-inch cubes.
- Prepare your pressure canner according to the manufacturer’s instructions. Some brands like Presto require filling with 3 quarts of water, while All American recommends 2-3 inches.
- Add a jar rack to the bottom of the canner and heat the water inside the canner over medium heat.
- Combine the diced chicken, chicken stock, carrots, sliced onions, and celery in a large, stainless steel sauce pot. Bring the mix to a rolling boil. Over medium heat, simmer gently for 30 minutes.
- Season with salt (pickling or kosher salt) and pepper, as desired. Add bouillon cubes, if preferred, and simmer until the cubes dissolve.
- Use a canning funnel or ladle to transfer the hot chicken soup into the hot jars. The jars should be 1/2 solids and 1/2 cooking liquid, with a 1-inch headspace.
- Remove air bubbles using a bubble popper. Wipe the rims with a damp paper towel.
- Place hot canning lids on the jars, apply the canning rings, and adjust them to fingertip tightness.
- Carefully load the filled jars into your canner using a jar lifter.
- Under high heat, bring the water to a full, rolling boil. Close the lid to the canner and open the vent pipe. Vent the canner for 10 minutes.
- Close the petcock or return the weight/pressure regulator. Allow the canner to pressurize until it reaches the level recommended per your altitude and canner type:
Dial-gauge pressure canner:
- 0 – 2,000ft: 11 lbs
- 2,001-4,000ft: 12 lbs
- 4,001-6,000ft: 13 lbs
- 6,001ft and up: 14 lbs
Weighted-gauge pressure canner:
- 0 – 1,000ft: 10 lbs
- 1,001ft and up: 15 lbs
Post Processing
- On your timer, set 75 minutes for pint jars or 90 minutes for quarts.
- Once the processing time lapses, turn off your stove. Give the canner time to cool naturally until the pressure gauge reaches zero.
- Remove the jars from hot water using a jar lifter and place them upright on a draft-free surface to cool for 12-24 hours.
- After cooling, test the seals by pressing the lid’s center with your finger. If the lids flex up and down, the jars didn’t seal properly. Refrigerate and use any unsealed jars within five days.
- Remove the screw bands from the sealed jars to prevent rusting. Label the jars with the contents and the date of canning.
- Store the jars in a cool, dark, dry, clean place and enjoy your home-canned soup for up to 2 years.
- Prep Time: 30 minutes
- Canning Time: 75 minutes
- Cook Time: 30 minutes
Nutrition
- Serving Size: 1 and 1/2 cups
- Calories: 140kcal
- Sugar: 2.6g
- Sodium: 584mg
- Fat: 4g
- Saturated Fat: 0.3g
- Carbohydrates: 11g
- Fiber: 2.3g
- Protein: 14g
- Cholesterol: 7.7mg
