Description
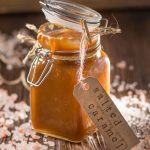
Canning delicious, acidified, dairy-free pear butter salted caramel sauce is safe using a water bath canner. This sweet and fruity sauce tastes so good it may just be your new go-to caramel!
Ingredients
Scale
- 4 lbs pears (peeled, cored, and coarsely chopped)
- 1/3 cup apple cider vinegar
- 2 teaspoons bottled lemon juice
- 2–1/2 cups dark brown sugar
- 2 tablespoons sea salt or Kosher salt
Instructions
- Wash pears thoroughly and rinse under cool running tap water.
- Cut them lengthwise into halves, peel carefully, and core them.
- Add the coarsely chopped pears, lemon juice, and apple cider vinegar in a 4-6 quart heavy saucepan or crock pot. Attach a lid.
- Place on a stovetop and simmer using high heat for 30-40 minutes until tender. Turn off the stove and set the pot aside.
- Process the mixture into a smooth puree using a food mill or immersion blender. You can also press the pears through a colander.
- Return the pureed mixture to a crock pot, add salt and brown sugar, cover with a lid, and set on medium-high heat.
- Simmer for 3-4 hours until the pulp develops a thick consistency (not runny when scooped with a spoon) and deep-brown color. Stir the mixture every 30 minutes.
- Wash pint-sized canning jars, lids, and rings in hot soapy water. Rinse jars and place in simmering water until ready to use. Set the lids and screw bands aside to air-dry.
- Prepare your water bath canner by filling it with water halfway and heat it to boiling on the stove. Ensure a canning rack is placed inside the canner.
- Use a canning funnel to fill the hot jars with hot pear butter. Leave ¼ inch headspace.
- Remove air bubbles using a bubble popper.
- Wipe the jar rims using a damp paper towel. Place the canning lids on and apply the screw bands, twisting until fingertip-tight.
- Use canning tongs to load the jars into your boiling water canner, ensuring the water level is 1 inch over the jars. Add boiling water as necessary to ensure water completely covers the jars.
- Adjust the temperature to high heat to bring water to a rolling boil. Place a lid on your canner.
- Process the pint or half-pint jars for 15-30 minutes, adjusting the time per your altitude.
- Once the jars are fully-processed, turn off the heat. Wait 2-5 minutes before removing them from the hot water using a jar lifter.
- Place the jars on a cushioned wire rack or towel-covered countertop to cool for 12-24 hours.
- Once cool, remove the screw bands and inspect the canning lids. Press the top of each lid with a finger to check the seals. Vacuum-sealed jar lids don’t flex when pressed.
- Put any unsealed jar in the refrigerator and use them within 4-5 days.
- For sealed jars, label them with the contents and canning date. Store them in a clean, dry, cool place.
- Prep Time: 5 hours
- Cook Time: 15 minutes
Nutrition
- Serving Size: 300g
- Calories: 410kcal
- Sugar: 89g
- Sodium: 600mg
- Fat: 0g
- Saturated Fat: 0g
- Carbohydrates: 102g
- Fiber: 7g
- Protein: 1g
